|
|
| (223 intermediate revisions by 61 users not shown) |
| Line 1: |
Line 1: |
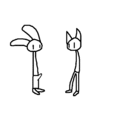
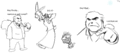
| [[Image:RubyQuest.gif|thumb|right|The Ruby Quest logo.]]'''Ruby Quest''' is a [[Quest]] game being run by a tripfag named Weaver. What initially began as a confusing puzzle romp has swiftly become a descent unto madness not unlike the best [[Call of Cthulhu]] game you have ever been in, but twice as fucked up.
| | {{Best|month=February 2009}} |
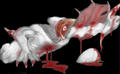
| [[Image:Ruby summary.png|thumb|right|The Ruby Quest summary]]
| | ''"Rubyrubyrubay aahahahaa"'' |
| The archives of the game can be found [http://suptg.thisisnotatrueending.com/archive.html?tags=Ruby here.]
| | -Kaiser Chiefs |
|
| |
|
| If you want to discuss the game with others, there is an [irc://irc.rizon.net/RubyQuest IRC discussion available on the channel '''irc.rizon.net''', room '''#RubyQuest'''] (you can go [http://www.rizon.net/chat.php here] and just type "/join #RubyQuest" in the message line to connect if you don't want to set up an IRC client).
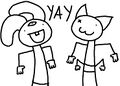
| | '''''Ruby Quest''''' is a [[Quest]] game completed by a [[tripfag]] named Weaver. What initially began as a confusing puzzle romp has swiftly become a descent into madness not unlike the best ''[[Call of Cthulhu]]'' game you have ever been in, but twice as fucked up. One of RQ's main side effects, aside from a few new memes, is the generation of fan art. Unbelievably vast quantities of it. I mean seriously, we've got pictures of fan-pairings of the hypothetical children of a couple who, in canon, may have barely even met each other. |
|
| |
|
| Also see: [[Ruby Quest Theories]].
| | [[Image:RubyQuest.gif|thumb|right|The ''Ruby Quest'' logo.]] |
| | [[Image:Ruby_meme.png|thumb|right|How most people find out about ''Ruby Quest''.]] |
|
| |
|
| Vekter has constructed a quick-glance guide of notes and important information that everyone should probably keep open during threads. Check it out at http://vekter.dfellowes.com/ruby/ (NOTE: Most of this information is from a subjective point of view. Don't take anything there for granted.)
| | This article has been split into various other articles due to its large size: [[Ruby Quest Characters]], [[Ruby Quest Summary]] and [[Ruby Quest Theories]]. |
|
| |
|
| ==Characters== | | == Information == |
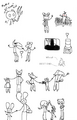
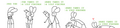
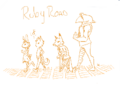
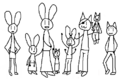
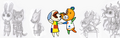
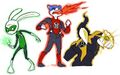
| See [[Ruby Quest Characters]] for full descriptions. Expand the gallery for individual pictures. | | * '''Author:''' Weaver; |
| {{Cg|Characters|center|<gallery>
| | * '''Length:''' 31 threads; |
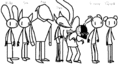
| Image:rubycast2.gif|A teaser pic of the entire cast, by Weaver | | * '''Running Time:''' From December of 2008 until March 2009; |
| Image:Group-shot-finished-hueg.jpg|The characters of Ruby Quest. | | * '''Status:''' Finished; |
| Image:Color_Cast.png|RQ The Movie! This pic is a WIP. | | * '''Categories:''' Mindfuck; mystery; suspense; violence. |
| </gallery>|<gallery>Image:Piratehooker.png|Ruby
| | * '''Original Art:''' Yes; |
| | |
| | == Threads == |
| | The archives of the game can be found: |
| | * as [http://suptg.thisisnotatrueending.com/collection.html?collnum=0 archived threads] on [[Sup/tg/]]; |
| | * as [http://stuff.veekun.com/rubyquest/ a one, big, long page]; |
| | * as [http://nepeta.mozai.com/Ruby_Quest/ a series of flash animations]; |
| | * as [http://evilcorporation.com.br/rubyquest/ one big HTML compilation]; |
| | * as [https://mspfa.com/?s=17145 though it were an MS Paint Adventure]; |
| | * or [http://www.youtube.com/watch?v=lJkc_LUbmwA&list=PLHO1rc05qiGvvKw4wi9VePXQvTVEatX-HA Series of narrated youtube videos]. |
| | |
| | The side story John Quest can be found [http://suptg.thisisnotatrueending.com/archive/3354728/#3354965 here], in case you're feeling too lazy to check the first link on the list above. |
| | |
| | == How It's Played == |
| | Much like other early [[Quest|quests]], Ruby Quest players would write suggestions, and the ones considered relevant by the Quest Master would be used to make the story move forward. |
| | |
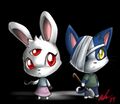
| | == [[Ruby Quest Characters|Characters]] == |
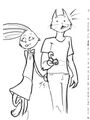
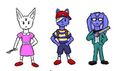
| | See [[Ruby Quest Characters]] for descriptions and fanart of each character. [[Ruby_Quest_Characters#Ruby|Ruby]] is the player-controlled protagonist of the adventure, and her companion [[Ruby_Quest_Characters#Tom|Tom]] is controllable much of the time as well. The cast has grown to over a dozen characters throughout the course of the story. |
| | |
| | <div class="toccolours mw-collapsible mw-collapsed"> |
| | Expand to see various portraits of the cast of characters. |
| | <div class="mw-collapsible-content"> |
| | <gallery> |
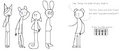
| | Image:Castqv9.gif|Weaver's listing of RQ cast. |
| | Image:Group-shot-finished-hueg.jpg|The characters of ''Ruby Quest'' (even more outdated). |
| | Image:Color_Cast.png|RQ The Movie! |
| | Image:RubyConcert.jpg|RQ cast In concert... |
| | Image:Piratehooker.png|Ruby |
| Image:Manlypose.png|Tom | | Image:Manlypose.png|Tom |
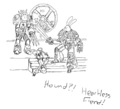
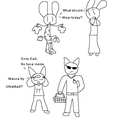
| Image:Hound_before.png|The Hound (name unknown) | | Image:Hound_before.png|Daisy |
| Image:Trickstered.png|Red | | Image:Trickstered.png|Red |
| Image:Stitches_before.png|Stitches | | Image:Stitches_before.png|Stitches |
| Image:Monitorface.png|"Monitorface" | | Image:Monitorface.png|Bella |
| Image:Grabbyace.png|Ace | | Image:Grabbyace.png|Ace |
| Image:Happyemobird.png|"Emobird" | | Image:Happyemobird.png|Jay |
| Image:Filbertalk.png|Filbert | | Image:Filbertalk.png|Filbert |
| | Image:Subject6.png|Nook |
| Image:Bloodydummy.png|The Dummy | | Image:Bloodydummy.png|The Dummy |
| Image:Watercooler.png|The Water Cooler | | Image:Watercooler.png|The Water Cooler |
| </gallery>}}
| |
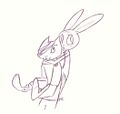
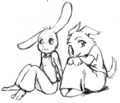
| ===[[Ruby_Quest_Characters#Ruby|Ruby]]===
| |
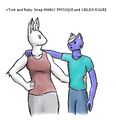
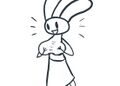
| '''Ruby''' is the main character of Ruby Quest. She has a Feminine Physique and has displayed psychopathic tendencies. She is a capable hooker and may be a pirate.
| |
|
| |
| ===[[Ruby_Quest_Characters#Tom|Tom]]===
| |
| '''Tom''' is Ruby's only friend in this place. He is well known for his MANLY PHYSIQUE, and is needed for most anything that requires strength to accomplish. Tom also has a pair of possibly vestigial arms, which he normally keeps concealed, and he lost one of his eyes during the adventure.
| |
|
| |
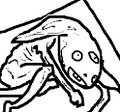
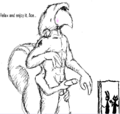
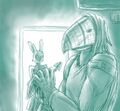
| ===[[Ruby_Quest_Characters#Hound_Zombie|Hound Zombie]]===
| |
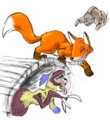
| The '''Hound Zombie''' is also referred to as the Hook Zombie, the Plant Zombie and Bellsprout, based on its form. Its current name is unknown. This horrible creature came through a broken mirror, and was killed with the power of Ruby's mean left hook, the purple vat of acid, and an electrical panel. The end boss of Part 2.
| |
|
| |
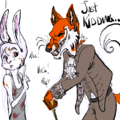
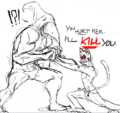
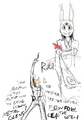
| ===[[Ruby_Quest_Characters#Red|Red]]===
| |
| '''Red''' <strike>is</strike> was a creepy motherfucker. He carries a cane with him, and is not too fond of personal questions. He was a former employee of the facility but was detained in locker #6. He is convinced that he is not trapped like the others, and that he is where he is entirely by his own choice. He has a very morbid sense of humor.
| |
|
| |
| ===[[Ruby_Quest_Characters#Stitches|Stitches]]===
| |
| '''Stitches''' is a bear that has regenerated from a pile of mush. We have seen him as a violent bear with a mouth for a head, an unidentifiable humanoid nailed to a wall, and as a wandering soul covered in stitches and panicking over his mutations. He seems to be afraid of Ruby.
| |
|
| |
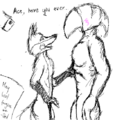
| ===[[Ruby_Quest_Characters#Ace|Ace]]===
| |
| '''Ace''' is a bird who appears to work at the facility. Also incorrectly referred to as "spade" due to the shirt he occasionally wears and how he signs his name. He was responsible for many of the notes found and finding Ruby after Red attacked her. He appears abnormally tough surviving a bomb attack, crowbar attack and surviving a large spear piercing his chest and presumably is the person who cleans up the facility.
| |
|
| |
| ==="Monitorface"===
| |
| Real name unknown. We have seen him/her a couple times on a monitor, and he/she has yet to tell us their name. He/she appears helpful, but seems to be very limited in what they can do for us. May be Dr. S.
| |
|
| |
| ===[[Ruby_Quest_Characters#Filbert|Filbert]]===
| |
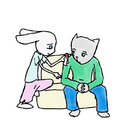
| Signed as "F" on medical notes, '''Filbert''' is the head doctor of the facility. He is missing his left hand, and is convinced he is not infected, regardless of evidence to the contrary.
| |
|
| |
| ===Dr. S===
| |
| As yet unknown.
| |
|
| |
| ===[[Ruby_Quest_Characters#Emobird|Emobird]]===
| |
| A bird we keep finding curled up crying in the corner of the room.
| |
|
| |
| ===[[Ruby_Quest_Characters#The_Dummy|The Dummy]]===
| |
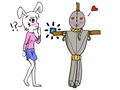
| '''The Dummy''' is a leather bound scarecrow on a rotating pivot. His eyes glow and 'squished' when we poked them. He is currently MIA.
| |
|
| |
| ===[[Ruby_Quest_Characters#Water_Cooler|Water Cooler]]===
| |
| He is disappointed in us all.
| |
|
| |
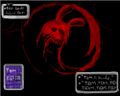
| ==The Metal Glen==
| |
| [[Image:Metal glen1.png|thumb|right]]
| |
| [[Image:Metal glen2.png|thumb|right]]
| |
| [[Image:Metal_Glen3.png|thumb|right]]
| |
| A poem written by weaver and originally attributed to William Murdoch. The Metal Glen is also the name of the facility holding Ruby designed by W. Murdoch.
| |
|
| |
| Recently, however, on a paintfag chat over IRC, Weaver revealed that he wrote The Metal Glen. He could of course be lying to us as usual, but Weaver is a pretty trustworthy guy, amirite?
| |
|
| |
| '''JUST KIDDING'''
| |
| <center>
| |
| {|border="1" cellpadding="5" cellspacing="0" style="font-style:italic"
| |
| |+ '''The Metal Glen'''
| |
| |
| |
| :My mother told me once of when
| |
| :A young hare ventured from her den
| |
| :And as she danced in field and glen
| |
| :The world sang joy about her.
| |
| :But wicked hateful things abound
| |
| :And that young hare these evils found
| |
| :Then whisked her up from off the ground
| |
| :And glen was left without her.
| |
|
| |
|
| |
| :The wicked power tore asunder
| |
| :And with this cruel and fateful blunder
| |
| :Cast her to a world of wonder
| |
| :Would she e'er see home again?
| |
| :And so hare flew that mournful day
| |
| :Over the sky and far away
| |
| :And down and down, beneath the sea
| |
| :To a place unlike the glen.
| |
|
| |
|
| |
| :A world of men and man's design
| |
| :A place where God's light would not shine
| |
| :A Hell of steel beneath the brine
| |
| :Where misery's echoes boomed.
| |
| :And all around her there were others
| |
| :Beasts like her, all sisters, brothers,
| |
| :Locked up, all, with one another,
| |
| :In deep sea-dark, entombed.
| |
|
| |
|
| |
| :And in this crypt far from the shore
| |
| :The hare lay down upon the floor
| |
| :Imprisoned there forever more
| |
| :And left to all her sorrow.
| |
| :Her tender world was lost and gone
| |
| :So joy and happiness foregone
| |
| :She slept and cried and prayed for dawn
| |
| :To wait the coming morrow.
| |
|
| |
| |
| |
| :The hound was still, the birds said naught,
| |
| :The fox denied he had been caught,
| |
| :The bear cried "This is just our lot",
| |
| :And surrendered to his pain.
| |
| :But the cat stood up and shook his head
| |
| :And rising from his metal bed
| |
| :He said "For now, I am not dead,
| |
| :And I will not die in vain!"
| |
|
| |
|
| |
| :He cried aloud with much disdain
| |
| :And tore about his stark domain
| |
| :And said "These walls cannot contain
| |
| :A force as strong as I!"
| |
| :And the fox just laughed, and the birds all cried
| |
| :And the bear knotted up himself and died
| |
| :But the hare looked on as the poor cat tried
| |
| :To break him free and fly.
| |
|
| |
|
| |
| :He shook his chain with all his rage
| |
| :And flew in anger 'round his cage
| |
| :Decrying this dark mournful stage
| |
| :And the hare stood up as well.
| |
| :With passion did she then respond,
| |
| :She chewed her ropes and broke her bonds,
| |
| :And freed the cat, they ran beyond,
| |
| :They ran to flee that hell.
| |
|
| |
|
| |
| :And what became of cat and hare?
| |
| :Did they break free to purer air?
| |
| :To guess their fate we shouldn't dare
| |
| :Perhaps their tale closed well.
| |
| :But for all the beasts trapped in the Nether
| |
| :All life from out the loch and heather
| |
| :The flock that could not work together
| |
| :Are sure still trapped in Hell.
| |
| |}
| |
| </center>
| |
|
| |
| ==Plot Summary==
| |
| '''IT IS HIGHLY SUGGESTED YOU READ THE THREADS INSTEAD OF THE SUMMARIES. THEY CAN BE FOUND HERE:''' http://suptg.thisisnotatrueending.com/archive.html?tags=Ruby
| |
|
| |
| ===Part 1===
| |
| [[Image:Ruby_Map.PNG|thumb|The known map as of part 1-3.]]
| |
| Consists of threads 1-4.
| |
|
| |
| Ruby awoke to find herself inside of a metal locker. After escaping, she finds herself in a barren room; performing some electrical repairs opens a section of the wall to reveal that the room is underwater. She then heads down a ladder and meets Tom, who is trapped behind a wall grate.
| |
|
| |
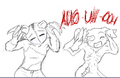
| Tom has a sculpture of random tools we need, but is unwilling to show it to Ruby, as she accidentally insults him. As an apology, she feeds him fish (found to later be a Bad Idea). After solving some puzzles, she open the way to the Z-Hatch room. She also opens a floor hatch to trade items with Tom. With teamwork, they open up the closet in the Z-Hatch room. The Bear monster inside attacks Ruby, who manages to escape far enough for Tom to sever its head.
| |
|
| |
| After a little more puzzle-solving, Ruby finally frees Tom from his cell. Ruby and Tom's embrace marks the end of Part 1.
| |
| <gallery>
| |
| Image:Bear_zombie_attack.jpg
| |
| Image:Ruby-and-Bearzombie.gif
| |
| </gallery>
| |
|
| |
| ===Part 2===
| |
| Consists of threads 5-9.
| |
|
| |
| Tom's MANLY PHYSIQUE allowed him to move a barrel, opening the way into the monitor room. Tom managed to sneak a peek at Ruby's panties while they were at it. They obtain the EYE DIAL, and then explore the Z-Hatch room once more. Tom moves the couch, revealing a secret passage that is only large enough for Ruby to fit through. Ruby finds a severed hand in the hidden room, and sends it through a pneumatic chute for completely inexplicable reasons. The room also contains a dispenser full of an unknown purple liquid.
| |
|
| |
| Ruby asks Tom for his condom, and he is disappointed to find she only needs it for puzzle-solving. After some experimentation with the purple acid, Tom reveals that he is not feeling so hot. He begins vomiting blood. Ruby quickly scrambles around, using an an analyzer to discover that Tom had arsenic poisoning from the fish, and that she could acquire an antidote if the power turned the power back on. While running around to find a way to get the power going, Ruby finds a hook and does a pirate impression to cheer up Tom. He smiles weakly. All of /tg/ d'aaaws.
| |
|
| |
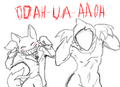
| Eventually, Ruby gets the electricity and Tom's antidote. However, this locks her in the back room, and a strange gas filling the room from the ventilation. Panicking, Ruby break the glass of the pneumatic chute. This helps only slightly. She then breaks the glass of the mirrored window along the back of the room, and finds the Hound monster on the other side. After brief scuffle, Ruby uses her mean left hook to defeat the abomination by flinging it through the glass acid dispenser and into the circuit board, but suffers a scratch to her head in the process. The impact of the monster on the circuit board powers down the room, and Ruby flees with the antidote, running to where she left Tom. Along the way, she begins to feel faint, but manage to make it to the Brig. Unfortunately, she find Tom is gone, and in his place is a great deal of blood. Ruby finally loses consciousness, and everything goes black.
| |
|
| |
| <gallery>
| |
| Image:Ruby_stands_victorious.png
| |
| Image:Its_a_snaaaake.jpg
| |
| </gallery>
| |
|
| |
| ===Part 3===
| |
| Consists of threads 10-13.
| |
|
| |
| Ruby wakes up in a dark room wearing footie pajamas. After adjusting her eyes to the dark, she realizes she is in her room, and Tom is there--but he seems a little off. She opens a drawer to find a key, then tries to turn Tom around. She finds that he has been stitched up, that he is very dummy-like. She snaps back to reality, finding herself holding a dummy in a new room. After exploring her surroundings, she exits the room and finds herself back in the Brig. The room she had been in was the one the Hound monster had emerged from. She heads back to the locker room and gets a few items that had been mysteriously removed from her inventory, including the arsenic antidote. She returns to the Brig to see an unreachable lever has descended from the ceiling. She then heads through the Z-hatch.
| |
|
| |
| She sees a fox sitting on the couch with a cane in the Z-room. He introduces himself as 'Red' and answers a few questions. He hasn't seen Tom. He doesn't know anything about the place they are trapped in. And he isn't trapped. Ruby notices the cane and asks Red to help pull the lever. He smiles, disturbingly, and agrees to help. After pulling the lever she asks a "few" more questions. Red says he is very tired of her questions and that if she doesn't stop he might have to bite her throat out. After an awkward pause, he says that he was "just kidding." Ruby, slightly scared, thanks Red and heads back to the Systems Room. Red does not follow. She picks up a wooden disc and inspects the computer. There are some hidden cameras inspecting the Locker Room, the Maintenance Room and an as-yet unexplored room. Tom is in this room, and so is a section of pneumatic tubing.
| |
|
| |
| Ruby heads to the Maintenance room. Red is nowhere to be found. She patches up the pneumatic tube, sends Tom the antidote, and heads to the Systems Room to see if he gets it. He does, and drinks it. But Ruby doesn't have enough time to celebrate, as Red enters the room. He smiles wider this time, and reminds Ruby that he doesn't want to hear anymore questions. Ruby understands and asks to excuse herself, but Red stops smiling and says he doesn't think so. And then lets her know that he was once again just kidding.
| |
|
| |
| Ruby heads downstairs, and Red follows. She believes the wooden disc will interact with a mechanism she found in the Dummy Room, so she heads there. Red stops her before she can enter and asks for some coins Ruby was carrying. She gives them to him, and he heads in with her. Using the cane, Red takes down the tarp, smiling even wider than before.
| |
|
| |
| Underneath is a horribly disfigured, body (which would later be called "Stitches"). Red laughs at Ruby's astonishment. And then he keeps laughing. Behind Ruby's back, his mouth splits apart to reveal an impossibly large, tooth-filled maw and tongue. He is, in fact, an abomination. As Ruby turns around, Red stops laughing.
| |
|
| |
| Ruby then looks at a cross peg in Stitches's hand, and Red says he is bored and departs. Ruby is about to take the cross peg, but the body suddenly seizes her arm. He says "Ruby" and everything turns to white.
| |
|
| |
| Ruby has a very strange dream, involving both Tom and Red. In the dream, Red makes a smile clearly not possible, as it curves up to the eyes. Tom complains that his eye hurts. Red uses the wooden disc to cut something and the dream ends.
| |
|
| |
| Ruby wakes up. The disc is missing. She leaves the room. Tom is sitting on a barrel in the brig.
| |
|
| |
| ===Part 4===
| |
| Consists of threads 14-17.
| |
| [[Image:Ruby_Map_part_2.PNG|thumb|The known map as of the end of part 4.]]
| |
| Tom and Ruby catch up with each other, and both express gratitude that the other is okay. Tom explains that Red let him out of the room where he was being held. Tom's stomach is feeling better, but now his eye hurts. Ruby, worried, offers to examine him. His eye opens freakishly wide, and Ruby has a vision of Tom sprouting additional arms and failing widely.
| |
|
| |
| The hallucination ends when Tom asks Ruby if she is okay. Ruby suddenly sees that the Brig is now completely free of blood and has an deep rift torn through the middle. She asks Tom to go to the other side of the room (suspecting that the gap is also imaginary), but he sees it too and declines to do so. He notes that it's been three days since he took the antidote, and that there were some intermittent odd noises coming from the walls.
| |
|
| |
| They proceed to examine Tom's former room. Inside they see a closed door that Tom notes was open earlier, another ladder down, some flesh-like membrane in the corner, a SCRAP OF PAPER, and a foot from a pair of footy pajamas containing a KEY.
| |
|
| |
| Ruby proceeds down the hatch and emerges feet-first from the floor of the room below them--gravity appears to be reversed on the other side of the chasm. She attempts to pull the lever on the floor (ceiling?), but it's missing a part. She returns to the previous room, at which point she notices that Tom's eye is actually gone. He tells Ruby that he lost it while he was being dragged into the room by something which, because of his sickness, he couldn't see clearly. It's mostly stopped hurting, though. They hug.
| |
|
| |
| After a short discussion, they return to the room where the Bear monster was first found, stopping briefly to note an eyehook fixed to the floor in the chasm room. This room has also been cleaned, and there is now a small, slightly indented safe on a shelf in the closet where the abomination had been. Ruby opens the WALL CABINET using the KEY she found in Tom's room. It contains another SCRAP OF PAPER and a black leather MEDICINE BAG fastened with an indestructible TINY PADLOCK.
| |
|
| |
| They return to the room with the pneumatic tube. It, like the others, is now blood-free. The mirror has been replaced with thick plastic, the acid container is repaired, and the electrical panel has a safety cover with an outlet in it. Oddly, the inside of the pneumatic tube is still blood-splattered from the HAND sent through it several threads ago.
| |
|
| |
| While leaving the room, the Z-hatch grate slams shut behind Ruby, leaving Tom inside. Remembering the command console, she returns to Tom's room to find that the door is open. Someone in the darkness with a Cheshire-cat grin tosses Ruby a THIN METAL ROD, and the door slams shut. She repairs the lever with the ROD, and pulls it to arm's length, only to have it retract. She climbs the ladder with the handle in hand, surprised at the amount of slack, and attaches it to the floor hook down the other ladder. A panel behind her opens, and she takes the CROWBAR from it.
| |
|
| |
| She attempts to smash the TINY PADLOCK and pry open the grate, but can't. Giving up, she enters the dummy room and notices a panel inscribed with archaic, unintelligible writing and a button diagram with a different layout. She applies her CROWBAR to the locked file cabinet, revealing a TINY KEY, which she uses to retrieve a PAPER SCRAP and a VERY SHARP SCALPEL from the medical bag. She returns to Tom's room and uses the SCALPEL to cut away the fleshy growth (which, unlike everything else here, doesn't bleed) to find a somewhat oversized EYE.
| |
|
| |
| Ruby notices an unpowered keypad with an extension cord below it, and pulls the extension cord with her to the dummy room, where she passes Tom the CROWBAR through the drop slot. Tom, in a sudden burst of MANLY PHYSIQUE, returns to the Bear room and smashes the hell out of the shelves and light in the closet. He then stands around awkwardly as /tg/ enters a thirteen-minute brain fart. Ruby, presumably tired of twiddling her thumbs, goes back to the lever room and tries pushing a few buttons. Button 1 causes distant water noises, and button 4 makes something far-off rumble. She decides to go check on Tom.
| |
|
| |
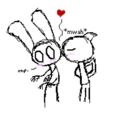
| While Ruby was gone, Tom says that the pipe in the ceiling had been clanking about every thirty seconds. Once again under the power of group narrative, Tom receives a flash of inspiration and bashes open the pipe under which he'd waited while /tg/ was trying to figure out what to break. A glass orb falls out onto the sofa, and the rattling stops. He unlocks the safe with it to retrieve the WOODEN DISC. He returns it to Ruby, who recognizes it and affixes it to the dial on the left. She points the dial to the top symbol, which opens the Z-hatch for Tom. They reunite, and Tom unexpectedly kisses Ruby.
| |
|
| |
| A short but thoroughly awkward moment passes, after which Ruby turns the dial towards the lower symbol and walks over to the pneumatic tube room. On the way there, however, Ruby is interrupted by pain as a giant eye rips open the top of her head. She wipes the blood away and closes the eye, hiding the event from Tom. She then takes another PAPER SCRAP from a new wall hatch, has Tom re-open the Z-hatch, and returns to him. He apologizes for being hasty with his earlier kiss, but Ruby dismisses it.
| |
|
| |
| They plug in the extendable power cord, return to the keypad, and punch in the number from the completed PAPER. The hatch opens to reveal an aquarium, but Weaver uses a narrative shortcut to abridge the changing of the power cord and dial again, leaving Ruby and Tom in front of an open doorway. They enter together to find that the monitors have all been broken. Ruby uses the CROSS PEG as she'd intended quite a while ago, and a ladder comes out of the wall. They climb.
| |
|
| |
| This room is short (more of an attic, really), and it's covered in insane scribblings with "RED" written in large lettering on the ceiling. There's also a circular diagram with a large bloodstain in the center, as though someone had recently slammed their head into it, and a box of cereal and teeth. They go back down and knock on the door, only to discover Red doing a Peach Wilkins impression: he won't let them through without the answer to his riddle.
| |
|
| |
| Tom and Ruby decide to go open the box marked to the contrary. Tom crowbars it open to reveal a BOWL OF CLAWED FINGERS and Ruby's mummified body, which Tom doesn't perceive. While Ruby freaks the fuck out, Tom pockets the fingers, uses the nearby sink (which spouts blood, as they are almost unsurprised to find), and fills up the BOWL with blood. Both of them go mix the TEETH, BLOOD, and FINGERS into a GODAWFUL SMOOTHIE and return to the monitor room - only to discover the door already open. The room has "NEVER CATCH ME NEVER NEVER NEVER NEVER" scrawled all over the back wall, and in the center of the floor is Red, propped up by the broken halves of a shovel shoved through his skull.
| |
| ----
| |
| <gallery>
| |
| Image:Redroll'd.gif|And thus, the Redroll was born
| |
| Image:Keikaku_dori_Tom.png|Just as planned.
| |
| Image:Red_Just_kidding.jpg|Red is just kidding again. Oh Red.
| |
| Image:Rubycorpse awesomeface.gif|A helpful diagram to see that the corpse is indeed Ruby.
| |
| Image:SUCH a headache.jpg
| |
| Image:Damn that cat breath.jpg
| |
| Image:Dancing_queen.gif
| |
| Image:Why so serious Red.png
| |
| </gallery>
| |
|
| |
| ===Part 5===
| |
| Consists of threads 18-21
| |
| [[Image:Ruby_Map_part_3.PNG|thumb|The known map as of the end of part 5.]]
| |
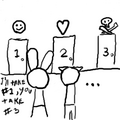
| Tom and Ruby enter the room. They immediately find out that Red’s insane scrawlings are not the only ones in the room, implying that there have been more people trapped in the room, since Tom was trapped in there. A face appears briefly on the room's monitor before disappearing again. A bit of exploring is interrupted by a large figure emerging from the sealed door to the north. Ruby gets the distinct impression that this figure is not friendly. While this is happening, Tom opens an unlocked box that Red left (he painted an arrow and the words “From Red”). He is too busy reading a note inside the box to notice the newcomer. The note in question was addressed to "♠".
| |
|
| |
| Tom discards the note; under it there is a makeshift bomb (which used the two coins). At this moment, Ruby remembers that the large figure was the one that shoved Ruby into the locker before her journey began. Tom notices the bomb, grabs Ruby and bails out of the room immediately. We last see the large figure kneeling down beside Red's corpse.
| |
|
| |
| One heroic escape from a creeping explosion later, Tom and Ruby end up back in the locker room. The access to the Systems Room has been blocked off by rubble. The power then goes off. There is a small, lighted crack behind the wall to the west that implies there is another room, but Ruby and Tom opt to explore the rest of the facility. They head to the Dummy Room and are disturbed by the dummy’s glowing red eyes. Tom jabs the dummy in the eyes, and hears a squishy sound. Despite trying not to, Ruby can't help but take another peek into the DO NOT OPEN box, but finds it empty. The two decide to head back to the secret room they saw earlier.
| |
|
| |
| They explore the secret room, which resembles a cafeteria. Tom pockets a bottle of champagne, and Ruby reads a note (see below). She hides the note from Tom. Tom offers champagne, Ruby declines, saying that they can drink when they get out, and they head west through another door after pocketing some walkie talkies. It’s locked, but the door itself offers little resistance to Tom’s efforts with the crowbar.
| |
|
| |
| They split up, Tom goes to pry off some debris in the brig, and Ruby heads through the door up some stairs. She sees a room with a fetus and a severed finger on display. She heads through a door into small room. She pockets a first aid kit and an oxygen tank. Meanwhile Tom breaks through the debris and ends up... in the adjacent room two floors up (next to Ruby). Tom finds a coin and a note (see below). Tom hands the coin to Ruby, she uses the vending machine to buy a key, and she hands the key to Tom through a hole in the wall. Tom’s room is locked from the inside. Unfortunately, the key drops down, and Ruby tells Tom goes to get it, but she hears footsteps outside.
| |
|
| |
| The door opens to reveal Stitches, and Ruby realizes he was the Bear monster. He introduces himself, and tries to hold his head (falling apart) together. The brig goes through some serious shit while this happens. Stitches apparently realizes that he is a monster, and leaves saying that he would "only hurt" Ruby. Tom gets the key and comes back up. Tom unlocks the door. Ruby tells him about Stitches, Tom tells Ruby about the note and they decide not to hide anything from each other. Ruby tells him everything she has been hiding from him, including about her third eye. Tom then lifts his shirt, and reveals he has two extra arms growing from his stomach.
| |
|
| |
| They head down and use some forceps to nab a card hidden in a hole in the wall. Then Ruby combines Red's cane and the shovel head into a BLUDGEONY CANESHOVEL (which incidentally is fucking underpowered in d20). Tom notices one of Red's hands behind a water cooler. They use the hand on the handscanner in the Dummy Room. The dummy now has blood on it, but nobody really cares because they’re too busy being horrified at the data shown on the screen.
| |
|
| |
| It shows Ruby looking into the "Do Not Open" box, Red sneaking up on her and possibly killing her. He then stuffs the body in the box and puts the "Do Not Open" sticker on it. Ace then enters the room and shows BLATANT disregard for the stickers instructions, discovering Ruby's body in the box weakly raising a hand for help. He looks around and the feed ends.
| |
|
| |
| At this point, Ruby may or may not have felt like crying on Tom's shoulder. But there would be no time for tears, as the large, probably unfriendly figure enters the room.
| |
|
| |
| <gallery>
| |
| Image:Ruby's note.gif|Ruby found this note
| |
| Image:Accident report.gif|Tom found this one
| |
| Image:HEY_LISTEN.jpg|/tg/ - An Annoying, Repetitive Voice.
| |
| Image:READ_THE_NOTE_TOM.jpg|READ THE NOTE, TOM, READ THE NOTE, READ THE NOTE
| |
| Image:READ_THE_TOM_HUG_NOTE.png
| |
| Image:A Gift from Red by FullmetalJoe.png
| |
| Image:Cutscene.png
| |
| Image:Second_arms_are_for_smilies.jpg
| |
| </gallery> | | </gallery> |
| | </div> |
| | </div> |
|
| |
|
| ===Part 6=== | | == [[Ruby Quest Summary | Summary]] == |
| Consists of threads 22-24
| | [[Image:Ruby summary.png|thumb|right|The ''Ruby Quest'' summary.]] |
| [[Image:Ruby_Map_part_4.PNG|thumb|The known map as of the end of part 6.]] | |
|
| |
|
| This episode begins with the large, unfriendly figure [Ace] entering the Dummy Room where Ruby and Tom are. After attempting diplomacy, Ruby and Tom are quickly cornered by him when he refuses to answer their questions. He lunges for Ruby, and she ducks under him and runs past. Tom slams his crowbar into Ace's left leg, and the two of them flee out of the room, and through the Z-Hatch. They think themselves momentarily safe, with Ace being far too large to fit through the tiny hatch, until Ace begins tearing open a hole in the wall. They climb the couch, and flee through the piping that Tom ripped open before.
| | It is '''highly recommended''' that you [[#Threads|read the actual threads]] instead of the summaries. All of the content in this section contains spoilers. You have been warned. |
|
| |
|
| They climb out and into a new room unlike any they have seen before. Examining it, they find a thick pair of gloves, a severed foot, a tattered labcoat, and a face staring at them from a monitor. When Ruby tries to talk to it, it flickers out into static. They also find an Odd Staff and an Empty Syringe. A moment's exploration later, and Tom also finds the first 4 notes [below] behind an eye poster on the wall, which are apparently Red's Diary. They find that below this room is the Baby Fetus Case room.
| | To see all the summaries, read about the setting and verify the timeline of the story, check the [[Ruby Quest Summary]] page. |
|
| |
|
| Descending, they open the Fetus Case with their access card, then use the finger they found to open the First Aid Kit. They find a Roll of Gauze, Wirecutters, and a Green Disk, which they attach to the Odd Staff. Ruby uses the Gauze Roll and some of the Tattered Labcoat to make Tom an eyepatch! Then they head down to the cafeteria and use the wire cutters to open the sealed hatch in the back. Inside, they find the High Clearance Access Card... and the skull of a goat. They take the access card, and Ace arrives, now armed with a makeshift harpoon.
| | == [[Ruby Quest Theories | Speculation and Theories]] == |
| | See the page [[Ruby Quest Theories]]. |
|
| |
|
| Ruby and Tom quickly flee upstairs, Ace hot on their heels. Tom uses the security card on the high tech door in the baby fetus room, but the door isn't opening fast enough. Ace charges in, and Ruby tosses the empty First Aid Kit box at the fetus case. The spear trap from the case lethally wounds Ace, and Ruby and Tom flee into the high security door, locking it shut behind them.
| | == Side Story: JOHN QUEST == |
| | | The story of Tom's Twin Brother John, as told by Weaver. Was apparently written as a mere distraction. |
| Inside they find a locker room, with locker 5 jammed shut, and lockers 3 and 6 needing some sort of key to unlock. Locker 7 has fallen down, through a hole in the floor. Looking through the hole, Ruby and Tom find themselves staring down into Ruby's starting room. Tom reads a Clipboard, which reveals the last two notes to us (below).
| |
| | |
| Tom then unjams his own locker, and finds it empty, except for a warning written in his own handwriting on the door: "Don't Trust 7." According to all the notes they've seen, Subject 7 is Ruby. Tom quickly shuts the door without mentioning this to Ruby, growing suspicious of her. Ruby then opens locker 6 using the Odd Staff, and finds a switch inside. They hit the switch, and as far as they can tell nothing happens. Then Tom pushes the button found under the clipboard. A pneumatic tube lowered, and the severed hand from thread 2 remakes its re-appearance.
| |
| | |
| Taking the hand, they use it on the hand scanner found in the Dummy Room... and note that the dummy is missing from the room entirely. The hand logs in as "F," revealing two video clips.
| |
| | |
| The first shows Red reading a book while Ace fixes a pipe in the Lounge Room. Ruby sneaks up behind Red, and uses the hook to tear open the side of his mouth. Ace quickly restrains her. Red looks at Ruby with what looks like regret as she is carried away, in place of the expected outrage or pain.
| |
| | |
| The second video shows Ruby visiting Tom in the medical room. She sits on the bed next to him, and they have a pleasant chat before beginning to make out. In the next scene, Ruby grabs a scalpel from the medical tray next to Tom. The camera flickers out for a little while, and when it returns, Ruby is leaving the room, drenched in blood. Tom is on the bed, and looks heavily wounded.
| |
| | |
| This episode ends with a very confused and frightened Tom backing away from Ruby as he wields the Bludgeony Caneshovel.
| |
| | |
| <gallery>
| |
| Image:Red's Journal, Oct 3.gif|Tom found this note...
| |
| Image:Red's Journal, Oct 7.gif|...and this one...
| |
| Image:Red's Journal, Oct 27.gif|...and also this one...
| |
| Image:Red's Journal, Oct 29.gif|...and finally this one.
| |
| Image:Nov_23rd.gif|Then he found a warning on the wall...
| |
| Image:Nov 1st.gif|...which continued to this part.
| |
| Image:Coloring walls is for pansies.png| RUBY HOW COULD YOU
| |
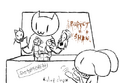
| Image:Tadadh2.png|[23:59] <@TG_Weaver> Tom's left side just has BAD LINE THICKNESS DISORDER, probably caused by an incomplete erasure
| |
| </gallery>
| |
| | |
| ===Part 7=== | |
| Consists of threads 25 - 27
| |
| | |
| Short episode this week. This one starts out with Ruby putting down her scalpel in an attempt to placate Tom. It works to a degree, though he orders her from the room. Ruby goes to the cafeteria to calm down. Instead of calming down, /tg/ gets her to combine some of the barbed wire and a glove to make a PRICKLY FIST. Shortly after, her third eye appears again, opening up an opportunity for her. Ruby decides to head back to the fetus room, wherein /tg/ has an epiphany. Ruby looks at the room with the third eye and notices her name scrawled in blood on the plaque. Apparently, the third eye allows her to see visions that she couldn't see before. She pulls the plaque off and finds a photo of six of the patients of The Metal Glen.
| |
| | |
| Ruby leaves to check out the locker room again with her third eye. Her investigation reveals a gigantic, archaic circle that causes her a great deal of pain to look at. Upon inspecting locker 2, she finds it's unlocked and has fresh blood on it. She opens it to receive a SMALL KEY, and starts heading back to the room where she and Tom had earlier emerged from the pipe. As she walks back, she finds a strange figure in the corner, crying. For once listening to her better judgment, she leaves the room and heads back to the pipe room.
| |
| | |
| She unlocks the cabinet with the key she found and reveals an unlocked door. On the other side is an exam room, much like the one Tom was murdered in. We find a large, red diagram, much like the ones we're used to seeing, and a few other things. However, exploration will have to wait; F wants a word with us.
| |
| | |
| We finally meet Filbert, the chief doctor of the facility. He explains a number of things, including that whatever the treatment they had been receiving worked a bit too well. When Ruby died, she reanimated and brought "something" with her. Filbert reveals that his only real priority is escape, and slowly becomes enraged at Ruby, apparently losing his grip on sanity. He insists that he is not infected and threatens to "remove the bad" from Ruby. Ruby promptly punches him with the PRICKLY FIST flees. As she enters the pipe room again, the screen comes to life with Filbert (now beginning to mutate), trying to get us to come back in. He starts rambling about how Ace will get her anyway and notes that he might not be under their control, but he IS taking orders from someone. Ruby flips him off. The screen changes shortly after to the mysterious face from earlier.
| |
| | |
| The face unlocks the door in the pipe room and, after Ruby asks him to call off Ace, he or she says "I'm sorry. I can't." in a hoarse voice. The screen cuts out and Ruby proceeds to the next room, which seems to be the entrance room to Lab B. We have a flashback where Ruby pushed Stitches off of a scaffolding into a series of blending turbines. After this scene, Tom shows up, and appears to have forgiven Ruby. Ruby tells him about the flashback and he doesn't seem too phased by it.
| |
| | |
| Ruby now decides to look into Lab B. It's padlocked with a lock with a giant ♠ on it: Ace's symbol. Any attempt to look normally into the room is thwarted by darkness, but peering in with the third eye shows only one thing: a menacing grin and two red eyes. While Ruby peers into Lab B, the sobbing black figure appears in the corner of the fan room. Tom confirms that it's real, and Ruby asks it what's wrong. It replies with "It's dark... IT'S SO DARK!" and turns as darkness envelops Ruby and Tom.
| |
| | |
| <gallery>
| |
| Image:WE ARE FAMILY.gif|A photo of what appears to be the patients of the Metal Glen.
| |
| Image:Dr S note.gif|Another note with a date on it! Just what we always wanted.
| |
| Image:Reappropriation note.gif|Another note, this one badly torn.
| |
| Image:Red's Journal, Nov 1.gif| Tom found this note
| |
| Image:SuperFetusThing.GIF| Appears in the corner, now easier to see
| |
| Image:Sodark.png|SO DARK
| |
| Image:Stitches blends.jpg
| |
| Image:RUUUBYPAAANCH.jpg
| |
| </gallery>
| |
| | |
| ==JOHN QUEST: Side Story==
| |
| | |
| The story of Tom's Twin Brother John, as told by Weaver. Can be found here: http://suptg.thisisnotatrueending.com/archive/3354728/#3354965 | |
|
| |
|
| | <div class="toccolours mw-collapsible mw-collapsed"> |
| | Summary of the side story. |
| | <div class="mw-collapsible-content"> |
| John was at his computer an office. Eh was carrying a Wepon, ID, and CANDYBAR. He Read the Note: | | John was at his computer an office. Eh was carrying a Wepon, ID, and CANDYBAR. He Read the Note: |
|
| |
|
| Line 357: |
Line 86: |
| John tried to throw Self through Windoh, but he was too big! He looked through the window, and saw Ruby! He used the ORB OF INFINITE PSYCH to try to contact her! But her forehead only glowed with power, and nothing happened. He shouted some obscenities into the intercom, ate the intercom, put his shoe on his head, looked at the motivational poster, and then ate the poster too. Then John's Co-orker OPAL came in. | | John tried to throw Self through Windoh, but he was too big! He looked through the window, and saw Ruby! He used the ORB OF INFINITE PSYCH to try to contact her! But her forehead only glowed with power, and nothing happened. He shouted some obscenities into the intercom, ate the intercom, put his shoe on his head, looked at the motivational poster, and then ate the poster too. Then John's Co-orker OPAL came in. |
|
| |
|
| He thought about inviting her to dinner, and then thought about eating her. He decided to multitask, and ate her for dinner. Then he punched Gamera, and PROJEKTEIL VOMMITS the rabbit at the window. His funny DIJESTIVE JUICES made her a little strange though. Almost exactly like the Hook Zombie. Then he used his AXIS CARD to go out the door and go to the BATHROM, but he was too short to reach the handle! He tries to climb his desk, but botches the climb roll. His DENSEITY is so grate he falls through the FLOOR! | | He thought about inviting her to dinner, and then thought about eating her. He decided to multitask, and ate her for dinner. Then he punched Gamera, and PROJEKTEIL VOMMITS the rabbit at the window. His funny DIJESTIVE JUICES made her a little strange though. Almost exactly like the Hound Zombie. Then he used his AXIS CARD to go out the door and go to the BATHROM, but he was too short to reach the handle! He tries to climb his desk, but botches the climb roll. His DENSEITY is so grate he falls through the FLOOR! |
|
| |
|
| He lands in a WIERD PLACE, and follows a LIGHT to the EDNING! We missed a point, god damn. | | He lands in a WIERD PLACE, and follows a LIGHT to the EDNING! We missed a point, god damn. |
| | </div> |
| | </div> |
|
| |
|
| | <div class="toccolours mw-collapsible mw-collapsed"> |
| | Expand to see images related to this side-quest. |
| | <div class="mw-collapsible-content"> |
| <gallery> | | <gallery> |
| Image:John x Tom.jpg | | Image:John x Tom.jpg |
| Image:JohnvsGamera.png | | Image:JohnvsGamera.png |
| | Image:SuperRubyWarsJohn.gif |
| | Image:Johneat.png |
| | Image:JAWns.gif |
| </gallery> | | </gallery> |
| | </div> |
| | </div> |
|
| |
|
| ==Timeline== | | == Additional Information == |
| [[Image:Timeline.jpg|thumb|right]]'''WARNING: VERY MUCH SPOILER.''' | | If you want to discuss the game with others, there is an [irc://irc.rizon.net/RubyQuest IRC discussion available on the channel '''irc.rizon.net''', room '''#RubyQuest''']. You can also check out more artfaggotry at [http://browse.deviantart.com/?q=%22ruby+quest%22 Deviantart]. Finally, there's a [http://tvtropes.org/pmwiki/pmwiki.php/Roleplay/RubyQuest TVTropes article.] |
|
| |
|
| *~Late May: (blank) testing procedures begin.
| | == Gallery == |
| *October 2: Tom's hands damaged.
| | This is a gallery for group shots and action scenes. See [[Ruby Quest Characters]] for fan art of individual characters and [[Ruby Quest Summary]] for images related to certain parts of the story. |
| *October 3: Red recommends alternative treatments as traditional treatments fail (implied for multiple subjets, not just Tom).
| |
| *October 7: Red hears whispered voices 'a second time,' alternative treatments approved and put into action.
| |
| *Before October 20: Official death of Stitches.
| |
| *October 27: Ruby seriouses Red and is detained, 'Everything Changes.'
| |
| *October 29: Red clubs Ruby, Ruby declared dead. May God forgive Red.
| |
| *November 1: Red takes actions leading to his detainment in cell 6 (probably a suicide attempt). Subject 6 already in brig. ♠ becomes '?' in at least one department's memoranda.
| |
| *November 8: Ruby attacks Tom in the medical room. This blood is never cleaned.
| |
| *November 23: Subject #6 isolated in Upper Lab B. Only ? (Ace) authorized to allow contact.
| |
|
| |
|
| ==Gallery== | | {{SectionalPromotions}} |
| {{Cg|Common Gallery|center|<gallery>
| | |
| | <div class="toccolours mw-collapsible mw-collapsed"> |
| | Expand to see a huge-ass gallery of images. |
| | <div class="mw-collapsible-content"> |
| | <gallery> |
| Image:Ruby Story time.png|Best. Fanart. Ever. | | Image:Ruby Story time.png|Best. Fanart. Ever. |
| Image:Angry Ruby.jpg|Mother of God | | Image:Angry Ruby.jpg|Mother of God |
| Image:Tom is now lava.jpg | | Image:Tom is now lava.jpg |
| Image:Goodenddw8.png|BEST END | | Image:Goodenddw8.png|BEST END [drawn by Weaver, but non-canon] |
| </gallery>|<gallery>
| |
| Image:RQRubyTomSum.jpg|ALMOST BEST END | | Image:RQRubyTomSum.jpg|ALMOST BEST END |
| Image:Puppet Show.png | | Image:Platonic_Ear_massage.jpg |
| | Image:Manly-physique.jpg |
| Image:WhatisthisIdonteven.png|what | | Image:WhatisthisIdonteven.png|what |
| Image:Unwarrantedruby.gif|This is not an uncommon reaction from many of the players. | | Image:Unwarrantedruby.gif|This is not an uncommon reaction from many of the players. |
| Image:Andthenrubywasazombie.png|And then Ruby was a zombie. | | Image:Andthenrubywasazombie.png|And then Ruby was a zombie. |
| Image:DoubleHug.png|All the better to hug you with, my dear | | Image:DoubleHug.png|All the better to hug you with, my dear. |
| Image:Doyoukissonthefirstdate.png|Tom is more resourceful than you'd think. | | Image:Doyoukissonthefirstdate.png|Tom is more resourceful than you'd think. |
| Image:RubyPaintchat.gif|pchat is a wild and dangerous place | | Image:RubyPaintchat.gif|pchat is a wild and dangerous place. |
| Image:Ruby_x_Femace.png|Indeed, indeed it is | | Image:Ruby_x_Femace.png|Indeed, indeed it is |
| Image:Oh_Painchat.png|A bit more Paintchat horror | | Image:Oh_Painchat.png|A bit more Paintchat horror |
| Line 401: |
Line 136: |
| Image:RubyxStitchesCriticalFailure.png|"...BUT IT'S WROOOOOOOOONG!" | | Image:RubyxStitchesCriticalFailure.png|"...BUT IT'S WROOOOOOOOONG!" |
| Image:Ruby_escapes.png|Ruby escapes... but with whom? | | Image:Ruby_escapes.png|Ruby escapes... but with whom? |
| | Image:Dorf_Quest_Cosplay.png|Beardbeard and company are... waaaaaait a minute. |
| Image:About damn time.gif | | Image:About damn time.gif |
| | Image:Puppet Show.png |
| Image:The ghost of Redmas past.jpg | | Image:The ghost of Redmas past.jpg |
| Image:Ruby_doink.jpg | | Image:Ruby_doink.jpg |
| Line 412: |
Line 149: |
| Image:Sadtom.png | | Image:Sadtom.png |
| Image:Totempole.png | | Image:Totempole.png |
| Image:Incredibly inappropriate.gif | | Image:Red HMS.png |
| Image:Red_is_still_kidding.png
| |
| Image:Tom_behind_a_cooler.gif | | Image:Tom_behind_a_cooler.gif |
| Image:RubyvstheDummy.jpg | | Image:RubyvstheDummy.jpg |
| Line 428: |
Line 164: |
| Image:Ace_and_Red_carameldancen.png | | Image:Ace_and_Red_carameldancen.png |
| Image:Weird_love.jpg | | Image:Weird_love.jpg |
| Image:StitchesLook.gif
| |
| Image:OTP.gif | | Image:OTP.gif |
| | Image:Younglove.png |
| Image:Sadendfm0.png | | Image:Sadendfm0.png |
| Image:OHGODWAT.gif | | Image:OHGODWAT.gif |
| Line 438: |
Line 174: |
| Image:SeeingEyeHound.gif | | Image:SeeingEyeHound.gif |
| Image:Dayatthebeach.gif | | Image:Dayatthebeach.gif |
| Image:Dorf_Quest_Cosplay.png
| |
| Image:PRINCESSBRIDE.png | | Image:PRINCESSBRIDE.png |
| Image:Birdsofafeather.gif | | Image:Birdsofafeather.gif |
| Image:BFFs.gif | | Image:BFFs.gif |
| Image:ComfortTeddy.gif|"L-LOOK AT ME! *sob* LOOK AT W-WHAT THEY *sniff* D-DID TO ME! I'M A *hic* M-MONSTER!" | | Image:ComfortTeddy.gif|"L-look at me! *sob* Look at what they *sniff* d-did to me! I'M A *hic* M-MONSTER!" |
| </gallery>}} | | Image:Ohfilbert.png |
| | Image:ResidentRQ.png |
| | Image:Magicact.png|Siegfried and Roy have nothing on these two. |
| | Image:Bedsidemanner.png|There's a reason Filbert is the head doctor. |
| | Image:Xrubytom2.png |
| | Image:Xrubytom3.png|Tom is a very frustrated man. |
| | Image:Xrubytom4.png |
| | Image:Xrubytom1.png |
| | Image:Roobyzoid.gif |
| | Image:Interrupted_nude.png|"B-but Tom, the c-cameras..." |
| | Image:Ruby_Ace.png |
| | Image:R_T.jpg |
| | Image:R_T2.jpg |
| | Image:FoxandtheHound.gif |
| | Image:TommyBravo.gif|Do the monkey with meh! |
| | Image:Teenrubysquad.png|SO GOOD! |
| | Image:RubyStory.png|Huzzah! |
| | Image:Feetstobig.gif |
| | Image:I'll kill you.png |
| | Image:TTGR.png|WHO THE HELL DO YOU THINK I HUG!?! |
| | Image:Rubymask.png|Ruby seems pretty legit, Tom, why not give her a hug? |
| | Image:Nevermind.png |
| | Image:1231904272266.jpg |
| | Image:AceRed.png |
| | Image:HoundStitches.png |
| | Image:TAG.png |
| | Image:1231718011207.png|Ruby likes to watch. |
| | Image:RubyXTeadog.png |
| | Image:DAT LINEUP.gif|Filbert's methods may be unorthodox, but they certainly seem effective. |
| | Image:Catwalk.gif |
| | Image:PillowFight.gif |
| | Image:PillowMASSACRE.gif |
| | Image:Magicshow.gif |
| | Image:Swingyz8.png |
| | Image:OTPkids.png|Ad'awwwwable. |
| | Image:HAPPYEND.png|Hopefully we can get this ending, eh? |
| | Image:HAPPYEND2.png|ILLEGAL IN MANY PLACES. |
| | Image:HAPPYEND3.png|We can only hope |
| | Image:Ruby__.jpg |
| | Image:Stepfurther.png|If Ruby's actions were determined purely by popular vote. |
| | Image:Indirect.png|"Psst. Hey, Tom. Look up my skirt." |
| | Image:FilXTom.png|Filbert's treatment was so effective, Ruby recommended it to Tom! As long as she gets to watch. |
| | Image:Rubymaddiescissors.gif|I don't think that's what Six meant by "scissors," girls. |
| | Image:Tomcure.png|I think filbert is a pretty cool guy. eh manipulates patients into sex and doesn't afraid of anything. |
| | Image:Clipend.png|SEX END. |
| | Image:Moocast.png |
| | Image:Neverhoodan.png |
| | Image:Rubyroad.png |
| | Image:Weaver.jpg|The only accurate depiction of Weaver |
| | Image:ALLTHINGSPOSSIBLE2.png |
| | Image:WH40kRQ.png |
| | Image:PixelRQChars.png |
| | Image:kids.png|Awwwwww! |
| | Image:Deliciousmiscegenation.png |
| | Image:Swingers.png |
| | Image:MitchxTammydawwwww.png|You know it's bad when your fanbase starts to ship your characters' kids. Who aren't even canon. |
| | Image:RubySeesAllYesEvenThat.png|No one is safe from the all-seeing gaze of Ruby! |
| | Image:YIP.png |
| | Image:2ndGenCombined.png|RQ: The Next Generation: The Teen Dramedy |
| | Image:2ndGenRescue.png|RQ: The Next Generation: The Teen Action Movie |
| | Image:ManlyGirlyFigure.gif|Learn the difference. It could save your life |
| | Image:MaddieBA.png |
| | Image:Glenbound.jpg |
| | Image:PHYSIQUE_SWAP.jpg |
| | Image:RedMedicine.png|Filbert has a rather loose interpretation of his orders to begin "secretly treating Red's rations." |
| | Image:StitchesExam.png|"Hey, D-doc... just how--ah!--how much l-longer does this--hah!--exam t-take?" |
| | Image:Mantrain.png|After all they've been through, you can hardly blame them for a little rowdiness after they finally escape. |
| | Image:RQsixtythree.png|The next installment of Robby Quest will be on Thursday. |
| | Image:Tickle.png|HOW IS BABBY FORMED |
| | Image:SpeedoFil.png|As a doctor, Filbert knows better than to believe the old myth about not swimming right after you eat lunch. |
| | Image:Filcomplaint.png|Filbert is like Dr. House, except with sex instead of bitterness. |
| | Image:DoctorFil.gif |
| | Image:FilAce.png|Sexual harassment is still a major problem in many smaller organizations. |
| | Image:Upsidedown.png |
| | Image:Snuggles.png |
| | Image:AceUnmasked2.png |
| | Image:FutureFamilyPhoto.png|>Ruby fumbles with the condom, rather unfamiliar with these things. |
| | Image:FilSix.png|Assuming that the amount of "treatment" increases the degree of mutation, we now know how Subject 6 became so dangerous. |
| | Image:Menageatrois.png|Ruby and Tom have developed their own way of inducting people into their SPECIAL FAMILY. |
| | Image:HerosReward.png|Big Damn Heroes deserve Big Damn Rewards. |
| | Image:DEADEND.png|EVERYBODY DIES BOXDOG CROSSOVER END |
| | Image:Jayrubytominbedbyetc.PNG|Say what you want, this is my favourite GOOD END |
| | Image:FilXJay.png|I didn't know you were a cowboy, Jay. |
| | Image:JayBath.png|It's time for a little... BISEXUAL HEALING. |
| | Image:TheReturnToMetalGlen.png |
| | Image:TheFourthSurvivor.gif |
| | Image:MYPARENTISDEEEAAAAD.png|Not everyone gets to live. |
| | Image:GangstaQuest.png |
| | Image:Asspals.png|Their children will reclaim the Earth. |
| | Image:RQGlowingPit.png|>You have broken into a peculiar chamber through the base of the ocean. |
| | Image:FilRuby.png|Ruby's personality appears to undergo sudden changes rather frequently. |
| | Image:Adoption.png|Ruby, you can't just take in every suffering abomination you find chained up in a water filtration system. |
| | Image:BadInfluence.png|The kids love Crazy Uncle John, but he tends to be something of a bad influence. |
| | Image:Rule_75.png|"If it is nonhuman, there is art of it as a human." |
| | Image:Questmen.png |
| | Image:DaisyBattle.gif |
| | Image:FilBella.png|Also, Bella, you really need to stop spying on everyone over the security system during their intimate moments, Bella. |
| | Image:RUBYPAUNCH.gif |
| | Image:AceStitchesFight.gif |
| | Image:MINDVISIONOHGODNO.png|Ruby sees what you did there. And there. And there and there and there and there... |
| | Image:GIVEUSAHUGTOM.png |
| | Image:Ruby_Fortress.png |
| | Image:ACETIME.gif |
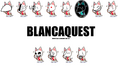
| | Image:BLANCAQUEST.png|Goddamn shapeshifters |
| | Image:FilXChloe.png|That Chloe is such a playful scamp. |
| | Image:1235013967569.gif|Yes, Weaver drew this. |
| | Image:1235014650439.jpg|Everyone has always known Tom was a mushroom head. |
| | Image:1235013027244.jpg| |
| | Image:1235015442922.jpg| |
| | Image:MushroomForest.gif |
| | Image:Can_we_keep_him.png |
| | Image:Its_so_dark.png |
| | Image:Lucid_Ending.png |
| | Image:More_RQ.jpg |
| | Image:RQ_Chibi.jpg |
| | Image:RQ_AC.png |
| | Image:RQ_Merchandise.gif |
| | Image:RQ_MG.jpg |
| | Image:RQ_sum.png |
| | Image:Ruby_Lantern.jpg |
| | Image:Walkan.png |
| | Image:Wheeee.gif |
| | Image:Wheeeee.gif |
| | Image:Not_Tommy.jpg|That's not Tom. |
| | Image:Manlyphysique.gif|Oh god how did this get here I am not good with computer. |
| | Final Battle.jpg |
| | Ruby-Maddiepuppies.jpg |
| | HahaAlreadyCappedIt.png |
| | StitchesLook.gif |
| | Bear zombie.jpg |
| | Dummy sees Dummy never sleeps.jpg |
| | </gallery> |
| | </div> |
| | </div> |
| | |
| | [[Category:Quests]] |
| | [[Category:Furry]] |


 Weaver's listing of RQ cast.
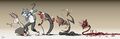 The characters of Ruby Quest (even more outdated).
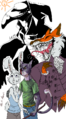 RQ The Movie!
 RQ cast In concert...
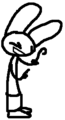 Ruby
Ruby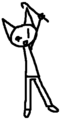 Tom
Tom Daisy
Daisy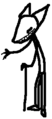 Red
Red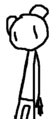 Stitches
 Bella
Bella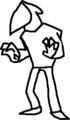 Ace
Ace Jay
Jay Filbert
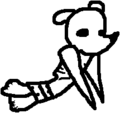 Nook
Nook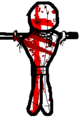 The Dummy
 The Water Cooler


 Best. Fanart. Ever.
 Mother of God
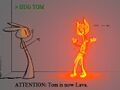
![BEST END [drawn by Weaver, but non-canon]](/mediawiki/thumb.php?f=Goodenddw8.png&width=120) BEST END [drawn by Weaver, but non-canon]
BEST END [drawn by Weaver, but non-canon] ALMOST BEST END

 what
what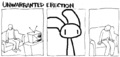 This is not an uncommon reaction from many of the players.
 And then Ruby was a zombie.
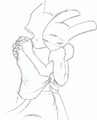 All the better to hug you with, my dear.
 Tom is more resourceful than you'd think.
 pchat is a wild and dangerous place.
 Indeed, indeed it is
 A bit more Paintchat horror
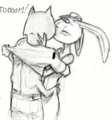 The ending most of us are hoping for.
 "Awww, isn't that cute..."
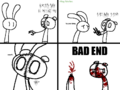 "...BUT IT'S WROOOOOOOOONG!"
 Ruby escapes... but with whom?
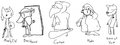 Beardbeard and company are... waaaaaait a minute.


 OTP
OTP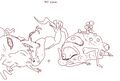 ALTERNATE BEST END.

 "L-look at me! *sob* Look at what they *sniff* d-did to me! I'M A *hic* M-MONSTER!"
 Siegfried and Roy have nothing on these two.
 There's a reason Filbert is the head doctor.
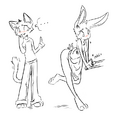
 Tom is a very frustrated man.

 "B-but Tom, the c-cameras..."

 Do the monkey with meh!
 SO GOOD!
 Huzzah!
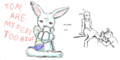
 WHO THE HELL DO YOU THINK I HUG!?!
 Ruby seems pretty legit, Tom, why not give her a hug?
 Ruby likes to watch.
 Filbert's methods may be unorthodox, but they certainly seem effective.


 Ad'awwwwable.
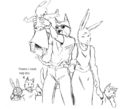 Hopefully we can get this ending, eh?
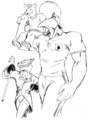 ILLEGAL IN MANY PLACES.
 We can only hope
 If Ruby's actions were determined purely by popular vote.
 "Psst. Hey, Tom. Look up my skirt."
 Filbert's treatment was so effective, Ruby recommended it to Tom! As long as she gets to watch.
 I don't think that's what Six meant by "scissors," girls.
 I think filbert is a pretty cool guy. eh manipulates patients into sex and doesn't afraid of anything.
 SEX END.
 The only accurate depiction of Weaver
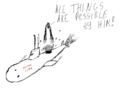

 Awwwwww!
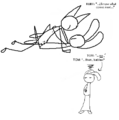
 You know it's bad when your fanbase starts to ship your characters' kids. Who aren't even canon.
 No one is safe from the all-seeing gaze of Ruby!
 RQ: The Next Generation: The Teen Dramedy
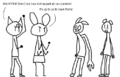 RQ: The Next Generation: The Teen Action Movie
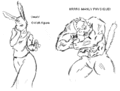 Learn the difference. It could save your life
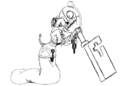
 Filbert has a rather loose interpretation of his orders to begin "secretly treating Red's rations."
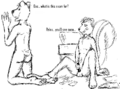 "Hey, D-doc... just how--ah!--how much l-longer does this--hah!--exam t-take?"
 After all they've been through, you can hardly blame them for a little rowdiness after they finally escape.
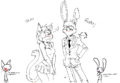 The next installment of Robby Quest will be on Thursday.
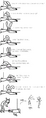 HOW IS BABBY FORMED
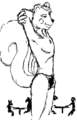 As a doctor, Filbert knows better than to believe the old myth about not swimming right after you eat lunch.
 Filbert is like Dr. House, except with sex instead of bitterness.
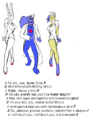
 Sexual harassment is still a major problem in many smaller organizations.
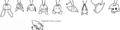
 >Ruby fumbles with the condom, rather unfamiliar with these things.
 Assuming that the amount of "treatment" increases the degree of mutation, we now know how Subject 6 became so dangerous.
 Ruby and Tom have developed their own way of inducting people into their SPECIAL FAMILY.
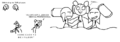 Big Damn Heroes deserve Big Damn Rewards.
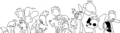 EVERYBODY DIES BOXDOG CROSSOVER END
 Say what you want, this is my favourite GOOD END
 I didn't know you were a cowboy, Jay.
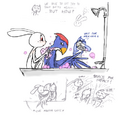 It's time for a little... BISEXUAL HEALING.
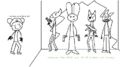
 Not everyone gets to live.
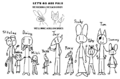 Their children will reclaim the Earth.
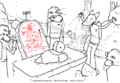 >You have broken into a peculiar chamber through the base of the ocean.
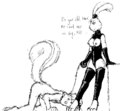 Ruby's personality appears to undergo sudden changes rather frequently.
 Ruby, you can't just take in every suffering abomination you find chained up in a water filtration system.
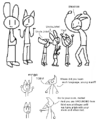 The kids love Crazy Uncle John, but he tends to be something of a bad influence.
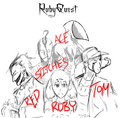 "If it is nonhuman, there is art of it as a human."
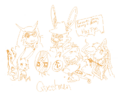
 Also, Bella, you really need to stop spying on everyone over the security system during their intimate moments, Bella.
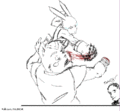
 Ruby sees what you did there. And there. And there and there and there and there...

 Goddamn shapeshifters
 That Chloe is such a playful scamp.
 Yes, Weaver drew this.
 Everyone has always known Tom was a mushroom head.
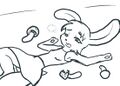


 That's not Tom.
 Oh god how did this get here I am not good with computer.


![BEST END [drawn by Weaver, but non-canon]](/wiki/File:Goodenddw8.png)


